-
Your cart is currently empty.
Aluminum Boat Repair: The Complete DIY Guide to Fixing Your Boat With Alumaloy
- Apr, 01 , 26
- Derrick Bradshaw

Owning an aluminum boat is one of the great joys of outdoor life. Whether you use it for fishing quiet lakes, exploring coastal waterways, navigating river systems, or simply enjoying weekends on the water with family and friends, an aluminum boat represents freedom, adventure, and connection to the natural world. Aluminum boats have earned their popularity for good reason. They are lightweight, durable, corrosion resistant, and relatively affordable compared to fiberglass alternatives. Many aluminum boats provide decades of faithful service with minimal maintenance, making them the workhorse of recreational and commercial boating.
But aluminum boats, for all their durability, are not invincible. Dents from submerged rocks, cracks from impact with logs or dock structures, punctures from sharp debris, and corrosion from saltwater exposure can all sideline your vessel and leave you facing an unpleasant decision: pay hundreds or even thousands of dollars for professional hull repair, buy a replacement boat, or try to fix it yourself. For most boat owners, that third option has traditionally been the least accessible, since aluminum welding requires specialized equipment, expensive consumables, and years of practice to master.
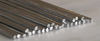
That equation changed dramatically with the introduction of Alumaloy aluminum repair rods 40 rod bundle Alumaloy aluminum repair rods rods. This innovative product has made it possible for anyone, regardless of welding experience or equipment, to perform permanent, watertight, structurally sound repairs on aluminum boats using nothing more than a standard propane torch. In this comprehensive guide, we cover everything you need to know about aluminum boat repair with Alumaloy, from identifying and assessing damage to completing a professional quality fix that will keep your boat on the water for years to come.
Before you pick up a torch and a repair rod, you need to understand the different types of damage that commonly affect aluminum boat hulls and how each type should be approached for the most effective and lasting repair.
Impact damage is by far the most common type of damage to aluminum boats. This category includes dents, creases, gouges, and punctures caused by contact with rocks, submerged logs, sandbars, reef structures, dock pilings, trailer rollers, and other obstacles. The severity of impact damage ranges from minor cosmetic dents that have not compromised the hull's integrity to serious punctures that allow water to enter the boat. Minor dents that have not cracked or stretched the metal beyond its elastic limit are generally cosmetic and may not require repair beyond reshaping if desired. However, deeper dents that show signs of cracking, metal fatigue, or thinning need immediate attention to prevent the damage from spreading during future use.
Corrosion represents a more insidious form of damage because it often progresses slowly and may not be immediately visible. While aluminum naturally resists corrosion through the formation of a protective aluminum oxide layer on its surface, this protection can break down under certain conditions. Saltwater environments accelerate corrosion, particularly in areas where the protective oxide layer has been scratched, abraded, or damaged. Galvanic corrosion occurs when aluminum is in electrical contact with dissimilar metals such as steel, copper, or bronze in the presence of an electrolyte like saltwater. This type of corrosion can be particularly aggressive and can cause rapid deterioration of the aluminum in contact zones. Pitting corrosion appears as small, localized holes or rough patches on the hull surface and can eventually penetrate through the material if left untreated.
Fatigue cracking is a form of damage that develops gradually over time due to repeated cyclic stress and vibration. Every time your boat hits a wave, bounces on its trailer, or vibrates from engine operation, the hull structure flexes slightly. Over thousands of these cycles, microscopic cracks can initiate at stress concentration points and slowly grow until they become visible and structurally significant. The most common locations for fatigue cracks on aluminum boats include the transom area where the outboard motor mounts, rivet lines and seams where stress concentrates, areas around through hull fittings, the keel line particularly near the bow, and structural joints between hull panels and reinforcing members.
Rivet failures are a chronic concern on older riveted aluminum boats and are worth understanding even if your boat is welded, as many older boats use a combination of welding and riveting. As rivets age, they can work loose due to repeated flexing of the hull panels, corrode due to galvanic reaction between different metals, or crack due to fatigue. Loose or missing rivets allow water intrusion that can gradually worsen if not addressed. While individual rivets can sometimes be tightened by peening or replaced with oversized rivets, extensive rivet failure across a section of hull may require a more comprehensive repair approach involving Alumaloy.

To appreciate why Alumaloy represents such a breakthrough for boat owners, it helps to understand why traditional aluminum welding is so difficult and why professional repairs are so expensive.
Aluminum TIG welding, which is the standard professional method for hull repair, requires a AC/DC TIG welding machine with high frequency start capability, pure argon shielding gas in a large cylinder with regulator, ER4043 or ER5356 aluminum filler wire, a clean tungsten electrode, proper protective equipment including an auto darkening helmet, and extensive training and practice to develop the necessary hand skills. The total equipment investment easily exceeds $1,000 to $5,000 for quality gear, and the learning curve is steep. Aluminum TIG welding is widely regarded as one of the most difficult welding processes to master. The weld pool forms and moves very quickly, the material conducts heat rapidly making temperature control challenging, and the slightest contamination causes porosity and weak welds.
MIG welding of aluminum with a spool gun is somewhat more accessible but still requires a MIG machine with aluminum capability, a spool gun attachment, argon shielding gas, specialized aluminum wire, and considerable skill to produce consistent, leak free welds on thin boat hull material.
Professional aluminum boat repair shops typically charge between $100 and $250 per hour for hull work, and even a relatively simple repair can take several hours once you account for preparation, setup, welding, cooling, and finishing. Complex repairs involving multiple cracks, significant corrosion, or structural reinforcement can easily run into thousands of dollars. Add to this the cost of transporting your boat to and from the repair facility, the downtime while waiting for the work to be completed, and the inconvenience of being without your boat during prime boating season, and the true cost of professional repair becomes quite steep.
Alumaloy aluminum repair collection rods were developed by Bradshaw Consulting, Inc. as a fundamentally different approach to aluminum repair. Rather than trying to simplify the welding process, which has proven resistant to simplification due to the inherent physics involved, Alumaloy takes a brazing approach that eliminates the most challenging aspects of aluminum repair entirely.
The key innovation is temperature. Alumaloy works at approximately 728 degrees Fahrenheit, which is nearly 500 degrees below the melting point of aluminum. This means you are never in danger of melting through the hull, warping panels, or creating the heat related defects that plague amateur welding attempts. A standard propane torch provides more than enough heat to reach this working temperature on any aluminum hull thickness you are likely to encounter.
Alumaloy's patented alloy formulation contains precisely calibrated magnesium content that ensures smooth, controlled flow without the sparking and sputtering that plague generic brazing rods. This proprietary mixture is the result of extensive research and development and is protected by patent. Competing products that lack this precise formulation are significantly harder to use and produce less reliable results.
The mechanical properties of an Alumaloy repair are impressive. The alloy achieves a tensile strength of 39,000 PSI and can withstand pressures up to 650 pounds per square inch. To put this in perspective, common marine aluminum alloys such as 5052 and 5086 have tensile strengths in the range of 33,000 to 42,000 PSI. This means an Alumaloy repair is comparable in strength to the original hull material and often stronger. The repair is also completely watertight when properly applied, which is obviously the critical requirement for any boat hull repair.
Alumaloy contains no lead, no tin, and no cadmium, making it environmentally responsible and safe for use on vessels that contact waterways. Every rod is manufactured in the United States under consistent quality control standards.

Proper preparation is the single most important factor in achieving a successful, long lasting aluminum boat repair. This is not an exaggeration. The preparation steps account for roughly 80 percent of the difference between a repair that lasts indefinitely and one that fails on the first outing. Every minute you invest in preparation pays dividends in repair quality and longevity.
Begin by hauling the boat and placing it on a stable, level surface where you can comfortably access the damaged area from both inside and outside the hull if possible. Working on a boat that is unstable on its trailer or supports is both dangerous and counterproductive to achieving a quality repair.
Thoroughly clean the entire area around the damage, extending at least three to four inches beyond the visible edges of the crack, dent, or hole. Remove all marine growth, bottom paint, primer, anodizing, or protective coatings from the repair zone. Marine grade paint strippers can be used for stubborn coatings, but mechanical removal with a grinding disc, wire cup brush on an angle grinder, or coarse sandpaper is equally effective and often faster. The goal is to expose bright, bare, shiny aluminum across the entire repair zone.
After removing coatings, address any corrosion. Pitting corrosion should be ground or sanded to smooth, sound metal. If pitting has penetrated significantly into the hull material, you may need to grind the area down to a uniform thickness and plan to build it back up with Alumaloy. Use a stainless steel wire brush or Scotch Brite pad for final surface conditioning. Avoid using carbon steel wire brushes, as they can embed iron particles in the aluminum surface that will promote galvanic corrosion later.
Aluminum oxidizes very rapidly when exposed to air, forming a thin but tenacious aluminum oxide layer within minutes. This oxide layer melts at approximately 3700 degrees Fahrenheit, far above the working temperature of Alumaloy or even the melting point of aluminum itself, and it will prevent bonding if not managed. Plan to begin your repair immediately after final surface cleaning. If there is any delay, lightly abrade the surface with a stainless steel brush again immediately before heating.
For cracks, take the additional step of drilling a small stop drill hole at each visible end of the crack. Use a 1/16 inch or 3/32 inch drill bit to create a hole that arrests crack propagation. This is a standard engineering practice that prevents the crack from growing further during or after repair. Next, use a small grinding disc or rotary tool to open the crack into a V groove of approximately 60 to 90 degrees. This V groove provides dramatically more surface area for the Alumaloy to bond with and allows the repair alloy to penetrate completely through the material thickness.
For punctures or holes larger than about a quarter inch in diameter, you will want to create a backing patch. Cut a piece of clean aluminum sheet slightly larger than the hole and position it behind the damage. This gives the Alumaloy something to flow against and prevents the repair material from falling through the hole. For very large holes or missing sections of hull, fabricate an aluminum patch from sheet stock of similar thickness to the hull, fit it into the damaged area with appropriate overlap, and bond it in place with Alumaloy applied around the entire perimeter.
With your thorough preparation complete, you are ready to perform the actual repair. Here is the complete process detailed for maximum clarity.
Gather all necessary materials and safety equipment before you begin. You will need Alumaloy rods, a propane torch or MAP gas torch, a stainless steel wire brush, safety glasses or a face shield, heat resistant leather gloves, and optionally a small mirror and flashlight for inspecting hard to see areas. Position everything within easy reach so you can work efficiently once the metal is hot. Work in a well ventilated area, ideally outdoors, to ensure adequate air circulation.
Begin heating the repair area by directing the propane torch flame at the base metal surrounding the damage. Use a broad, sweeping motion to distribute heat evenly across the repair zone. Avoid concentrating the flame on any single point, especially on thin hull material where burn through is possible even at brazing temperatures if the heat is focused too intensely in one location. For thin aluminum hulls, use the outer cone of the flame rather than the intense inner cone to provide a more diffused heat pattern. For thicker material such as transoms, keels, or reinforcing members, you can use a more concentrated flame and expect the heating process to take significantly longer due to the greater thermal mass.
Periodically test the temperature by touching the Alumaloy rod to the heated surface. When the aluminum base metal has reached the working temperature of approximately 728 degrees Fahrenheit, the Alumaloy rod will begin to melt and flow on contact. If the rod does not melt, continue heating. This built in temperature indicator is one of the most valuable features of Alumaloy, as it eliminates any guesswork about when the metal is ready for repair. Do not attempt to melt the rod with the torch flame directly. The base metal must be the heat source that melts the rod.
Once the Alumaloy begins to flow, guide it into the crack, hole, or damaged area using the torch to maintain the necessary base metal temperature. Simultaneously, use the stainless steel wire brush to scratch and work the molten Alumaloy into the surface of the base metal. This scratching or brushing action serves a critical purpose: it mechanically disrupts the aluminum oxide layer that continuously tries to reform on the surface of heated aluminum. By breaking through this oxide barrier while the Alumaloy is in its liquid state, you ensure direct metallic contact between the repair alloy and the base aluminum. This produces the strongest possible metallurgical bond. Many experienced Alumaloy users identify this brushing technique as the single most important skill for achieving professional quality results.
For deep cracks or V grooves, build up the repair in progressive layers. Apply a thin initial layer that covers the base of the groove, allow it to cool slightly until it solidifies, then reheat and apply additional material on top. Continue building layers until the repair is flush with or slightly proud of the surrounding hull surface. This layered approach prevents the molten alloy from flowing away or pooling unevenly, and it ensures complete bonding throughout the depth of the repair.
Allow the completed repair to cool naturally at room temperature. Never quench an Alumaloy repair with water, as the sudden thermal shock can create stress in the joint and potentially the surrounding hull material. Once completely cool, inspect the repair carefully for any voids, pinholes, incomplete areas, or spots where the alloy did not flow fully into the joint.
Finishing and painting the repair is straightforward. Alumaloy can be ground with an angle grinder, filed, sanded with progressively finer grits of sandpaper, drilled, tapped, and painted. For a smooth, invisible repair, start with 80 grit sandpaper to bring the repair flush with the surrounding hull, then progress through 120, 220, and 320 grit for a smooth finish. Apply a marine grade etching primer suitable for bare aluminum, followed by your chosen marine paint system. For below waterline repairs, use a proper antifouling paint system to protect both the repair and the surrounding hull from marine growth and corrosion.
Before putting your repaired boat back in the water, it is absolutely essential to verify that the repair is watertight. Launching a boat with an untested repair is a recipe for frustration at best and a safety hazard at worst.
The simplest and most reliable testing method for below waterline repairs is the water fill test. Place the boat on a level surface and fill it with water from a garden hose until the water level is above the repair site. Watch the exterior of the hull at the repair location for any sign of seepage, dripping, or moisture. Allow the water to stand for at least 30 minutes, as very small leaks may take time to manifest. Mark any leak locations, drain the boat, dry and re clean the affected areas, and apply additional Alumaloy to seal the leaks.
An alternative method that works well for both above and below waterline repairs is the soap bubble test. Apply a generous coating of soapy water to the outside of the repair area. From the inside, use a compressed air source at low pressure to gently pressurize the area around the repair. Bubbles appearing in the soapy water pinpoint any leak locations. This method is particularly useful for repairs in areas that are difficult to flood with water.
For critical structural repairs to areas such as the transom, keel, or outboard mounting points, particularly on boats that will be used in rough water or at high speeds, consider having a qualified marine surveyor inspect the repair before returning the boat to service. While Alumaloy repairs are strong and durable, having professional verification provides peace of mind for safety critical applications.
The Alumaloy community includes thousands of boat owners who have successfully repaired everything from twelve foot aluminum fishing boats to large pontoon platforms. Online reviews and forum discussions consistently highlight two themes: surprise at how simple the process is and satisfaction with how strong and lasting the results are.
One of the earliest notable success stories in the Alumaloy community came from a dedicated forum reader who had a boat he was deeply attached to despite significant hull damage. After learning about Alumaloy, he ordered the product and performed the repair the very next day. His experience demonstrated perfectly how Alumaloy empowers boat owners to take control of their repairs on their own timeline rather than waiting weeks for a professional shop to fit them into their schedule.
Other community members have reported successfully repairing pontoons with multiple punctures from rocks, patching corroded hull sections on saltwater fishing boats, fixing cracked transoms that had been quoted at over a thousand dollars for professional repair, and sealing rivet lines on vintage aluminum boats. The diversity of these repairs underscores Alumaloy's versatility and reliability across different types of damage and different hull configurations.
While knowing how to repair your aluminum boat is an invaluable skill, preventing damage in the first place is always the preferred strategy. Regular maintenance and smart practices can dramatically extend the time between repairs and preserve your hull's integrity.
Rinse your boat thoroughly with fresh water after every saltwater outing. Salt deposits accelerate corrosion and can be particularly damaging in crevices, joints, and areas around fittings where salt water can become trapped and concentrate. Inspect your hull regularly, ideally before and after every outing, paying special attention to known stress points such as the keel, transom, rivet lines, and areas around through hull fittings. Early detection of cracks, loose rivets, or developing corrosion allows you to address problems when they are small and easy to fix.
Apply a quality marine wax or protective ceramic coating to the hull at least once per season. This provides a sacrificial barrier that protects the aluminum surface from oxidation, UV damage, and minor abrasion. Check and replace sacrificial zinc anodes on schedule. These anodes are designed to corrode preferentially, protecting your aluminum hull from galvanic corrosion. When they are depleted, your hull becomes the sacrificial element in the galvanic circuit, which rapidly accelerates corrosion.
Store your boat on a trailer or hoist rather than leaving it in the water for extended periods whenever possible. Prolonged immersion, particularly in saltwater, dramatically accelerates corrosion and promotes marine growth that can damage protective coatings.
Alumaloy aluminum repair rods are available directly from castaloy.com, where you will find the complete product range, detailed full Alumaloy Alumaloy instructions page, video tutorials, and responsive customer support. Products are also available through Amazon, Walmart, eBay, and Etsy. Package sizes range from small five rod kits ideal for minor repairs to larger bundles and bulk quantities for extensive hull work or for keeping a supply on hand for future needs. Every Alumaloy rod is manufactured in the United States under strict quality control standards.
Whether your boat has a hairline crack that is seeping a slow trickle of water or a significant puncture that has put it completely out of commission, Alumaloy gives you the power and confidence to make a permanent, professional quality, watertight repair without leaving your driveway. Visit Castaloy for cast iron repair.com today to get your boat back on the water where it belongs.
Ready to repair instead of replace?
Alumaloy creates a watertight, 39,000 PSI bond on aluminum hulls. Used by thousands of boat owners to skip the marine repair shop entirely. Order today and be back on the water this weekend.
Order Alumaloy Rods →